You can make a target out of any materials and in any combination as long as it meets the requirements of the East’s Thrown Weapon rules, but some ways work better than others.
Royal Rounds compliant targets: the center of the target for TW Royal Rounds needs to be between 42 inches and 50 inches from the ground. This will require some adjustment to the final length of the front legs on the hard targets and careful measuring on soft targets.
Soft targets:
Normally these are targets used for spear throwing as hard targets will damage most spear tips. Use bales of straw (not any kind of hay, straw is cheapest) and stack them on top of each other. A no frills spear target can be made from two stacked bales of straw with a couple of sticks jammed into the ground behind them to give support. Stack the bales so the strings can’t be seen by the thrower. This keeps them from being cut through as quickly. When a bale gets damaged twine or cord of some kind can get it tied back together. Most spears only have a sharp tip. Beware that leaf-shaped spearheads can have sharp edges that will cut the twine or wire holding a bale together. The owner needs to volunteer this information when handing the spear over for inspection, but marshals should know to look for it as well. If sharp edges are found, the owner should either dull the edges or tape over them.
Purchasing straw: In rural areas, straw may be available roadside. Otherwise, look in the phone book for local hay or feed sellers and ask them about straw. Tell them it’s for archery targets and they’ll know what you need. Also, check with a local archery store, they might know someone.
Hard targets:
Use locally available, recycled materials when possible. Targets don’t have to be pretty since they’re slowly going to be destroyed with use. 2×4’s are great for legs and discarded pieces may be used, even if they were previously used for another project. If there’s a house getting built in your area, ask the site foreman if you can take scrap pieces out of the dumpster or scrap pile on site. Be sure to obtain permission from someone with the authority to donate materials.
The best thing to use for hard targets is the cross-section of a tree trunk, often called “rounds.” One could clamp together boards, but marshals tend not to prefer them. Look in the phone book or online for local sources in this order: sawmills (not lumberyards,) firewood suppliers, tree cutting services, landscaping companies and tree surgeons. There will probably be some overlap in the listings. At a sawmill ask if they have a scrap pile for firewood. This will be a much cheaper supply than asking for prime wood to be cut for you. Explain what you’re doing with this wood and after they stop smiling (you can even hear it over the phone) they’ll get you started. If nothing else, check around the nearest rural area immediately after a storm and see what’s getting cut up after it fell over. You have to move fast for this source, but often it’s yours for free if you get it off their property “right now.” Again, be sure you have the owner’s permission.
Certain kinds of wood are better than others for target rounds. Take one of the axes you plan to throw or a claw hammer with you to test the wood. Make sure the wood isn’t rotted (look at the “bad throws” section of the Basic throwing technique page to see a target with the center rotting out,) infested with insects, or cracking apart by sticking the ax or hammer claws into it in several places to be sure. Discoloration can be a sign of rot, but axes or hammers are much better indicators. When in doubt, skip that piece.
The species of wood is also important. Pine is something to avoid not because it’s soft but because the sap coats the weapons and when there’s enough build up they get hard to stick (except to you.) Oak, maple, walnut and other hardwoods are bad because it’s almost impossible to get weapons to stick in them, especially when they’re green. Good choices that come to mind are are willow and poplar, but give any wood the ax/hammer test. Wood is a natural material with inconsistencies.
How big should the round be?
One foot thick slabs are ideal but don’t turn away 10″ thick pieces if you find them. Much more than 12″ thick and the rounds get too heavy. A minimum diameter is 18″, a good maximum is 24″ (again because of weight.) The thickness is important for several reasons:
- A round that is too thin it will split apart the first day it’s used by someone with a large two-handed ax.
- The front legs of a target are held in with lag bolts. The rounds have to be deep enough that the weapons won’t stick into the target and hit the lags.
- When the target gets used enough, the face gets chewed up and soft. Rather than build a new target, a chainsaw can be used to shave the top inch or so off of the face. Presto, you have a new target – again.
The most common setup for targets is a “painter’s easel” assembly. There are 2 front legs to which the round is rigidly mounted, and a longer back leg which is on a pivot or hinge. The round and front legs want to lean back on the back leg enough to eliminate the danger of the target tipping over. The back leg should have a hole drilled in the end that touches the ground so a large spike can be driven in that will prevent it from sliding back and making the target fall.
Legs in detail:
- Buy two, 10′-0″ long 2×4’s.
- Cut one in half to make the front legs five feet long (see above about Royal Rounds).
- Cut the other one into four pieces. One piece 7′-0″ long for the back leg. The other three pieces make 1′-0″ long to strengthen the legs where they attach to the round (see the left-hand target in the photos below.)
As stated in the rules, targets need to be made so they don’t damage weapons. This means any metal fasteners or hardware should be hidden behind the target round. The tops of all the legs should meet no less than four inches from the top of the round, this ensures your method of hinging or pivoting the back leg doesn’t get damaged either. Here are some additional guidelines:
- When the target is completed, the center of the round should be at chest level of a 5′-10″ adult (using the round sizes and lengths of 2×4’s given earlier it should be easy to get this.)
- Not everyone has a vehicle that can easily carry the materials described above. However, the suggested sizes will give you a target that will lay flat in the back of a compact pickup and close the tailgate without having to remove the front legs. For a sketch to make collapsible target legs see this link.
- Use enough fasteners to make the target sturdy, but make your design using the least amount of hardware necessary.
- When using fasteners that include hex head bolts, screws, etc., be sure to use a standard size throughout the design. I’ve made almost 2 dozen targets, and all of them used 3/8″ lag bolts, nuts, and washers. This means all of them can be assembled with interchangeable parts and they can all be disassembled with one pair of 9/16″ sockets. You’ll never appreciate how important this is until you realize you need a spare fastener, or you lost one of the 3 required sockets on site earlier that day.
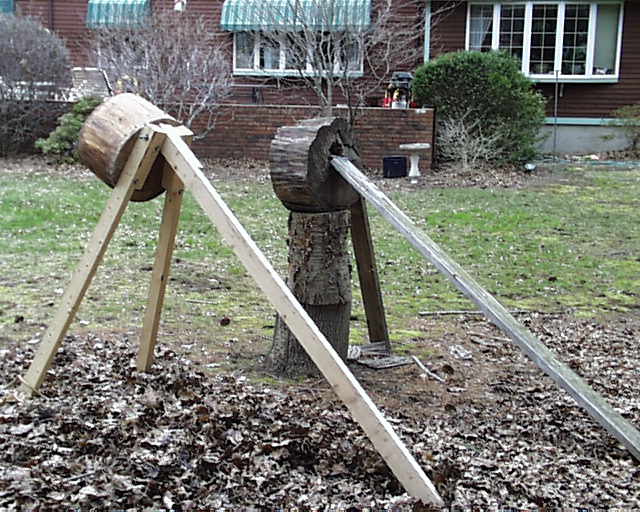
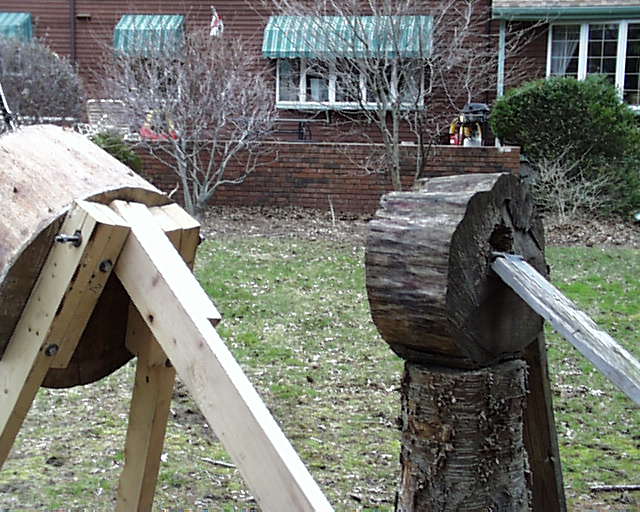
Below are examples of completed targets with some explanation. Note the targets are this close together for demonstration purposes only:


The target to the right has the back leg held on with a steel hinge so the angle the target leans back can be adjusted (it can be seen better in the right-hand photo.) Often the front legs would be held on with floor joist hangers.
The target on the left uses 2, 3/8″ x 6″ lag bolts on each front leg. A 1″ hole was drilled in the top of all 3 legs and 3/8″ all thread rod (steel rod threaded like a bolt the entire length) makes the pivot for the back leg. The all thread rod is held in place with a nut and washer at each end that is only finger tight so no tools are needed to take the back leg on or off. Note the all thread rod can be substituted for rope. Like the right-hand target the back leg can be pivoted for adjustment, but also shifted left or right if enough space is left at the pivot point.
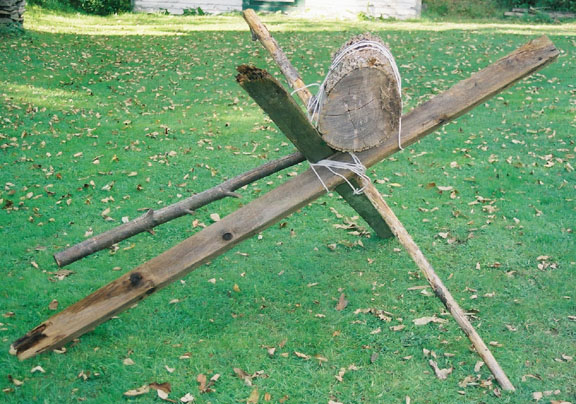
Don’t ever make a target like this:

Note the tree branch leg on the far left isn’t even touching the ground. The first known combined effort of East and AEthelmearc TW marshals (2 East, 1 AEthelmearc) and this was what we got. Hey, we panicked.
