Basic Throwing Technique
Before you begin, be sure to read and understand the Rules for Thrown Weapons. When entering a Thrown Weapons practice the Marshal will also ask you to read the Range Etiquette and Procedures before entering the range. If you have any questions or concerns about the rules and/or procedures, please ask your friendly marshal. Thrown Weapons is a lot of fun, but we are using sharp and pointy weapons, please play with care.
Consistency is the most important throwing technique. There are many factors involved in a good throw. As a beginner, you will have to train your body to hold the weapon, throw it, and release it the same way each time and at the same distance in order to predict your results. Beginners achieve a consistent throw quickly, the difficult part is consistent release. In its most basic form, the release is merely opening your hand with your wrist straight at the end of the swing to allow the weapon to clear. Some throwers flick their wrists when they release, claiming it adds extra momentum or snap to the throw. This may be true, but it’s hard to be consistent with every throw until you learn to control the snap. We teach without snapping because most people would get frustrated and give up before they learned the required control. We do not suggest this technique for beginners.
The only “must” with your stance is to face the target squarely. Where archers stand sideways to the target, throwers face the target straight on. After that, it’s mostly how you were taught or personal preference.
Below you’ll see some of the more common methods marshals use to teach a beginner using a “standard” tomahawk first, then other weapons. Read one method with axes all the way through first before skipping to the knife section. Also, be aware there are other ways than what you see here, but like everything else in life, there is no one way to do something correctly.
Phil’s No Throw Method:
This method teaches exactly which muscles to use and with how much force to throw an ax one rotation. When you go through the steps take note of your body positioning and how it feels. The first time you actually throw the ax everything will be the same except the ax will be released.
Step 1:
Approach the target with an ax in hand and rest the blade on the face of the target. Hold the ax so the end of the handle is flush with the bottom of your fist.

Step 2:
Adjust distance so your back is straight, the wrist is square (note how Phil’s forearm is 90 degrees from the ax handle) and proper reach is achieved while the blade still rests on the target face.
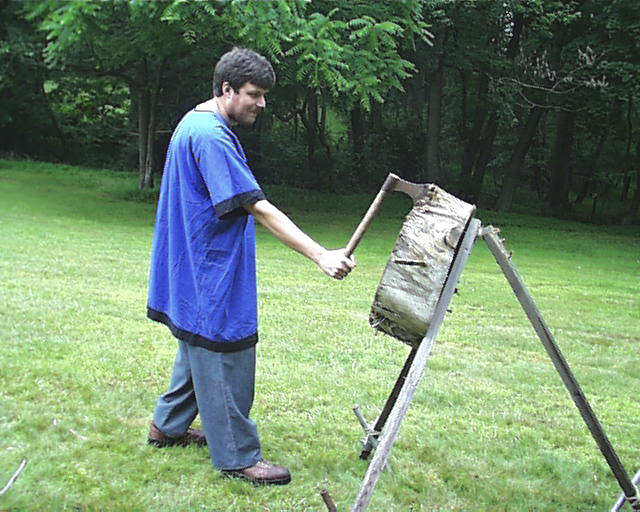
Step 3:
Bring ax straight back over the shoulder (like your shoulder is the center of a spinning vertical wheel.)
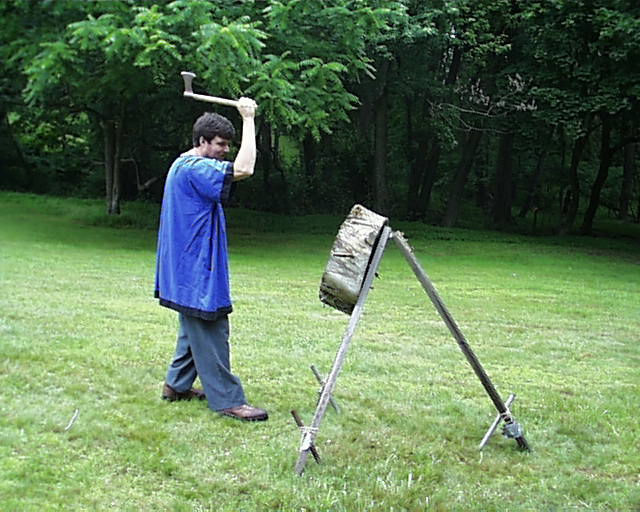
Step 4:
Swing the ax down into the target face with enough force to stick it in the target. The motion is very similar to hammering a nail into a wall. The handle of the ax should be parallel to the target face and point straight to the ground (six o’clock.) Note the elevation of your arm, and how extended it is from your body (your elbow should be bent just enough so it’s not locked out straight.) When you are throwing from the proper distance this is where your arm has to be when you release the ax. In these pictures the target is too short for the release to be shown correctly here.
Worry the ax out of the target face and repeat steps 3 and 4 until you are confident you know how it feels to swing hard enough to stick the ax. With this method, your throwing arm should be the only part of your body in motion. Now step back from the target to the proper distance for one rotation (about twelve feet using a “standard” tomahawk) and assume the proper stance for throwing. The only difference now is you release the ax when your arm is in the correct position (hammering a nail into a wall.)
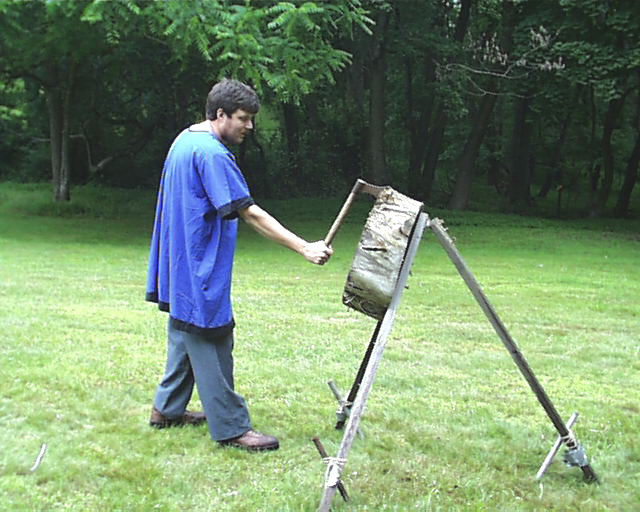
The Step Method:
Although fewer variables make the weapon easier to control some people prefer to step when throwing, it seems to put all the pieces together into a rhythm. Use the same technique as Phil’s No-Throw Method except a step is worked into the throw. Throwing at longer distances may require a step also, to gain momentum for the weapon (see Multiple Rotations in Advanced Throwing Technique.)
- Part your feet one in front of the other as if in mid-step when walking.
- Bring your arm back straight over your shoulder as shown in step 3 above.
- As you begin your throw take one normal step forward. Your step should be completed and your body should stop moving forward as you release the weapon.
Knives:
Most of what was shown above carries directly over into knife throwing, so much of it will not be repeated. If something is unclear, reviewing the ax discussions will help. As stated in Types of Weapons a beginner should use the heaviest knife they can handle. A heavier knife is more forgiving of an improper throw and is less likely to change its flight path on a windy day.
Why try knives?
- Knives are less expensive than axes. For the price of two tomahawks, you might get six good knives. It’s a good idea to get more knives (4 to 6 knives instead of 2 axes) since as a beginner you can get more practice at one time when you’re at a crowded range.
- Knives take up less space, and there’s no comparison for weight.
- Knives can be carried on the belt through the day of an SCA event without the fatigue one may experience carrying axes on his or her belt.
- Average skill with knives equates to above average skill with axes.
- If an inexpensive throwing knife gets bent slightly, find a slight depression in the dirt around you. Lay the knife across the depression so the bend faces up (like an arched bridge instead of a bowl.) Step on the knife carefully but firmly, while wearing shoes, and keep checking until it’s straight (by eye is accurate enough.)
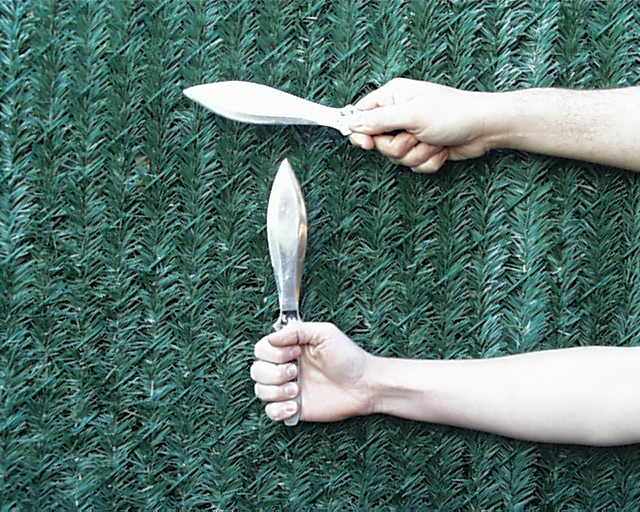
A popular throwing technique seen for knives is the thrower holding the knife by the blade. This is an advanced technique. Throwers should start by holding the handle. Apply the same technique for knives as you did for ax throwing (with or without a step) and note that a lighter weapon will rotate faster than a heavy one so you’ll probably want to start on the ten foot line (the closest you can be to the target in the East Kingdom of the SCA.) There are two ways to hold your wrist when throwing by the handle. The first way is to keep your wrist straight as you did for axes (the knife does 1 1/4 rotations at the ten-foot line.) The second way is to lock your wrist out all the way so the blade is pointing at the target at release (the knife does 1 full rotation.) Keeping the wrist straight with knives can be difficult (you may either snap the wrist or not maintain the 90-degree angle) so locking the wrist out prevents this from happening. See the photo below showing both grips.
Spears:
Step 1:
Find the balance point on the spear while you rest it on your palm with your thumb away from the point.
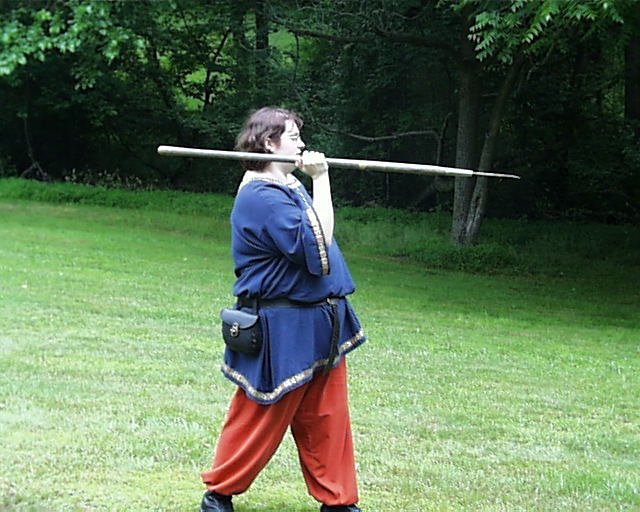
Step 2:
Hold it so as you throw the spear it should stay parallel to the ground, your wrist working as a pivot. At release you should only be holding the spear by your thumb and index finger.
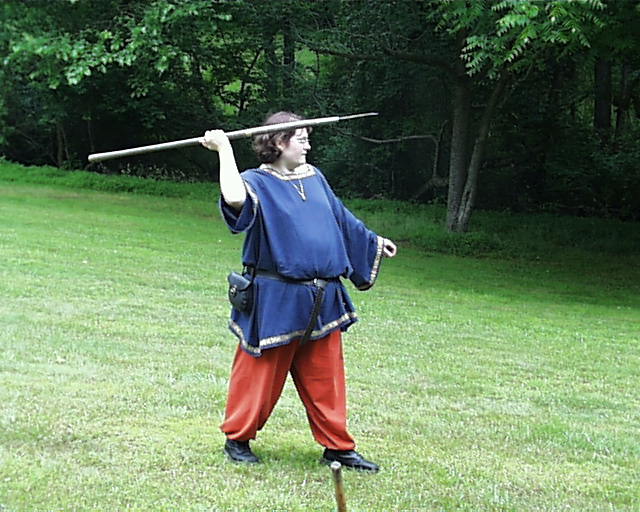
Step 3:
Follow through after release.
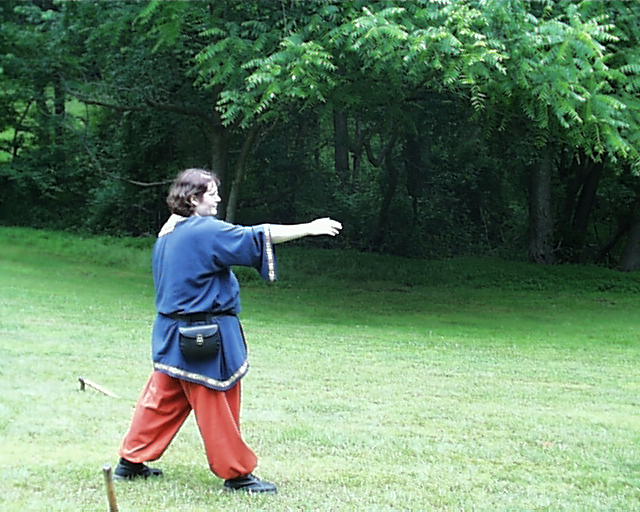
Most spears need to thrown into soft targets made of straw bales, the example shown here is a rake handle with rebar used as a point. This spear is cheap to make, and certainly will last if made well.
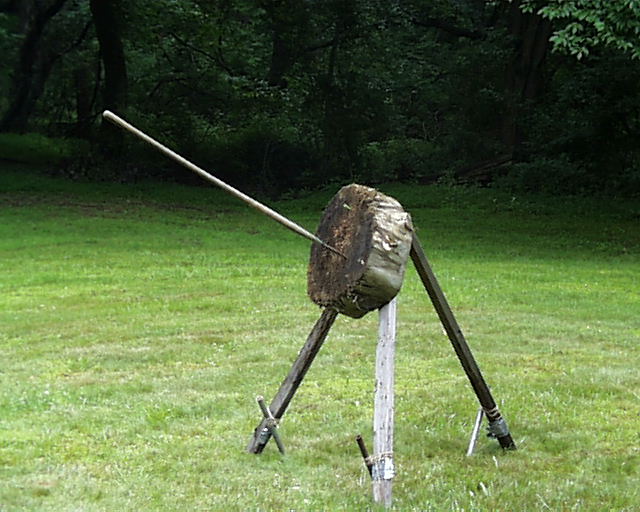
Javelin throwers from high school and college do this differently, but they are the “first timers” with the most experience we get at the range. By all means watch how they throw a spear, and never be afraid to ask them to show you how they do it and why.
Bad habits to avoid:
- Don’t push off with your feet (a spotter will see you standing on your toes when you release,) bring your shoulder forward (like a baseball pitcher,) or lean toward the target when throwing. All of these things adjust your distance from the target.
- Throwing the weapon “across” your body. The throwing arm should be centered on the target, not the thrower’s nose. If you center your body on the target and throw right handed, the weapon will travel to the target going slightly to your left. The most obvious sign is in the front legs of the target. As you face the target, right handers will replace the leg on the left hand side as the weapons keep chopping them up, but the right leg is fine. Left handed throwers will replace the right hand leg.
Examples of improper throws:

- Handle pointing down (knife) or handle bounces off target face (ax): too close to target.
- Handle pointing up (knife) or back toward thrower (ax): too far away from target.
- Weapon arcs or lofts to the target and doesn’t stick when reaching the target: releasing too early. You’ll need a spotter to stand a safe distance away perpendicular to your throw (i.e.: weapon travels from left to right for them) to see this happening.
- Weapon nose dives straight into the ground in front of thrower: releasing too late (probably snapping the wrist, too.)
- Ax handles not pointing straight down (7 o’clock, 5 o’clock) or weapon tumbles through the air instead of rotating cleanly: not maintaining the plane of impact in your throw. You are either tucking the head of the ax behind your head like they do in the movies, or you need to tuck your elbow in when throwing. The elbow of your throwing arm should point to the target as you begin your throw, with the ax following that elbow as you near release.
Tips and tricks:
- Once you can consistently stick in the target, you can improve accuracy by making an aiming point on the target. Use two inch stick-on notes, a small piece of masking tape, or a blemish on the target face. The aiming point wants to be between the size of a quarter to 2″ square. Using pieces of tape or paper are best because you can easily move them around the target face, adding or deleting as needed. Using the aiming points on the target will not only develop accuracy but will improve your technique overall. You have to be good enough to stick weapons consistently before marking the target gives you any benefit.
- Note that several of the above improper throws resulted from the thrower being too close or too far from the target. Axes need to make one full rotation from the thrower to the target. In order to find your “sweet spot,” mark your footing so that you can find it again and adjust as you throw and retrieve your weapon. Scratching a mark into the ground with your heal or weapon handle is fine until 9 other throwers do it too. A marshal may have golf tees all different colors, just remember the color of your tee (and to give it back to the marshal when you leave.) If there’s no golf tee available, try a twig or axe handle. If your throw shows that you are too close, back up the length of half of your shoe and try again. Keep adjusting until you find the right distance. Small changes make a significant difference.
Another good example of a bad throw:
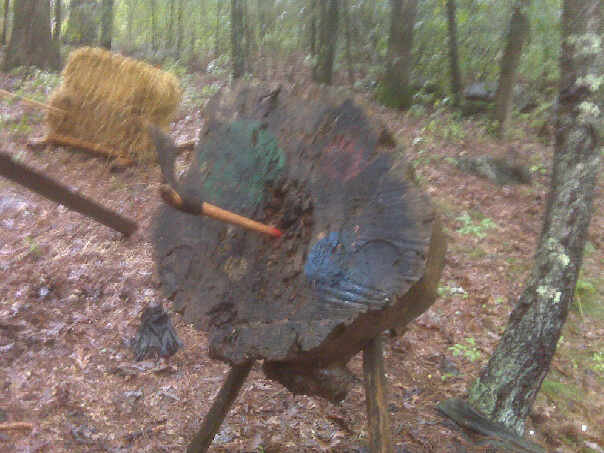
This is a french hawk that stuck in the center of the target. “Excellent, job well done,” you may say. Then you realize it’s stuck by the handle. The wood handle, no less.
Now that you’ve seen some of the ways to throw, go find a marshal and play. After some practice (one afternoon of throwing could do it) you’ll notice you can tell at the actual moment of release whether or not the weapon will stick. When you can do that: congratulations! You’ve just reached a milestone in thrown weapons. You have accomplished the basic skills needed to do any other kind of throwing. Minimal practice will maintain that level of ability, but the next new thrower will also meet that in an afternoon. Hopefully we have you hooked on this now, and you’ll push your abilities on your own.
